

From the wall outline to the finished roof structure
RoofGenius Pro turns a 2D outline into roof planes, and the roof planes into a complete timber roof structure ready to build: rafters, purlins, posts, collars and knee braces, with shop drawings and a cut list.
- SketchUp 2024 or later
- Metric and imperial
- 7 regional roof styles
- 14-day trial, no credit card
See it in action
A one-minute overview: from a few traced lines to the roof surface, the complete timber frame, the cut list and the shop drawings.
Four steps from outline to finished structure
The Quick wizard takes you through these steps on a single panel. If you prefer, each step is also available as a separate tool on the toolbar.
-
 1
Draw the outline
Draw the outer face of the walls with lines in top view. Walls can meet at any angle, the outline can have a courtyard, and one drawing can hold several buildings.
-
 2
Generate the roof planes
Roof from lines builds the roof surface with one click. It is the plane of the rafter tops, and its height follows from the wall top, the wall plate, the birdsmouth and the rafter size.
-
 3
Set up the edges
In the Roof panel (or the Edge editor) you give every edge its type – eave, gable or wall abutment – and its pitch. Roof sections of different heights are tied in automatically.
-
 4
Build the framing
Build framing creates the complete timber roof structure in the roof style you choose. If you change the roof, Refresh roof recalculates it.
What RoofGenius Pro can do
From any floor plan
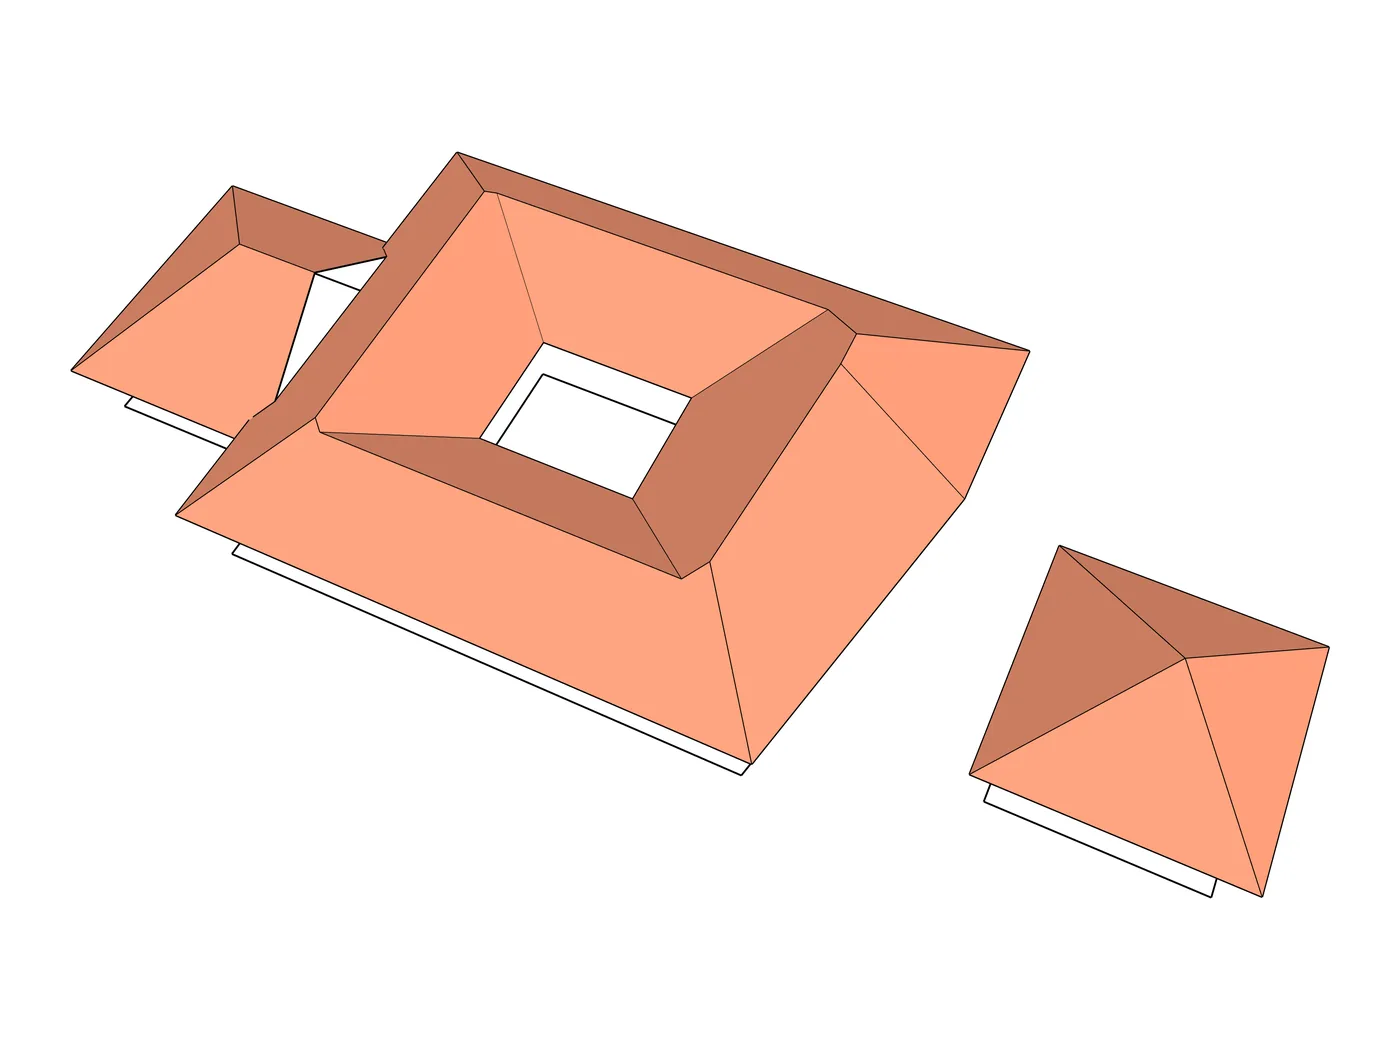
You don't have to think in rectangles. The outline can be L-, T- or U-shaped, with walls at any angle, a courtyard or a taller tower, and one drawing can hold several separate buildings.
Touching outlines of the same height are merged automatically. Sections with a different eave height – a lower extension, for example – are built tied into the main roof, and small wall jogs are bridged (default: 300 mm).
- Walls at any angle
- Inner outline as a courtyard or a taller tower
- Roof sections with different eave heights in one model
Roof shape set edge by edge
In the Edge editor you decide what each edge should be – eave, gable or wall abutment – and how steep. That gives you gable, hip, pyramid and lean-to roofs, a half-hip at the end of the ridge, or a roof with asymmetric pitches.
- A separate pitch for each edge
- Offset an edge along an axis without redrawing the plan
- Automatic tie-in between roof sections of different heights
- Half-hip and mansard main roof

Freehand roof when the shape is given
Sometimes the roof shape is fixed: an existing building, an architectural concept or an unusual form. Draw the roof planes freely with SketchUp's own tools and mark the walls in top view; RoofGenius Pro works out the eave overhang and the wall height from them, then places the rafters.
You can also reshape a generated roof plane freely. The surface is then detached from the floor plan, and from that point on the drawn plane is what counts.

A complete timber roof structure in one click
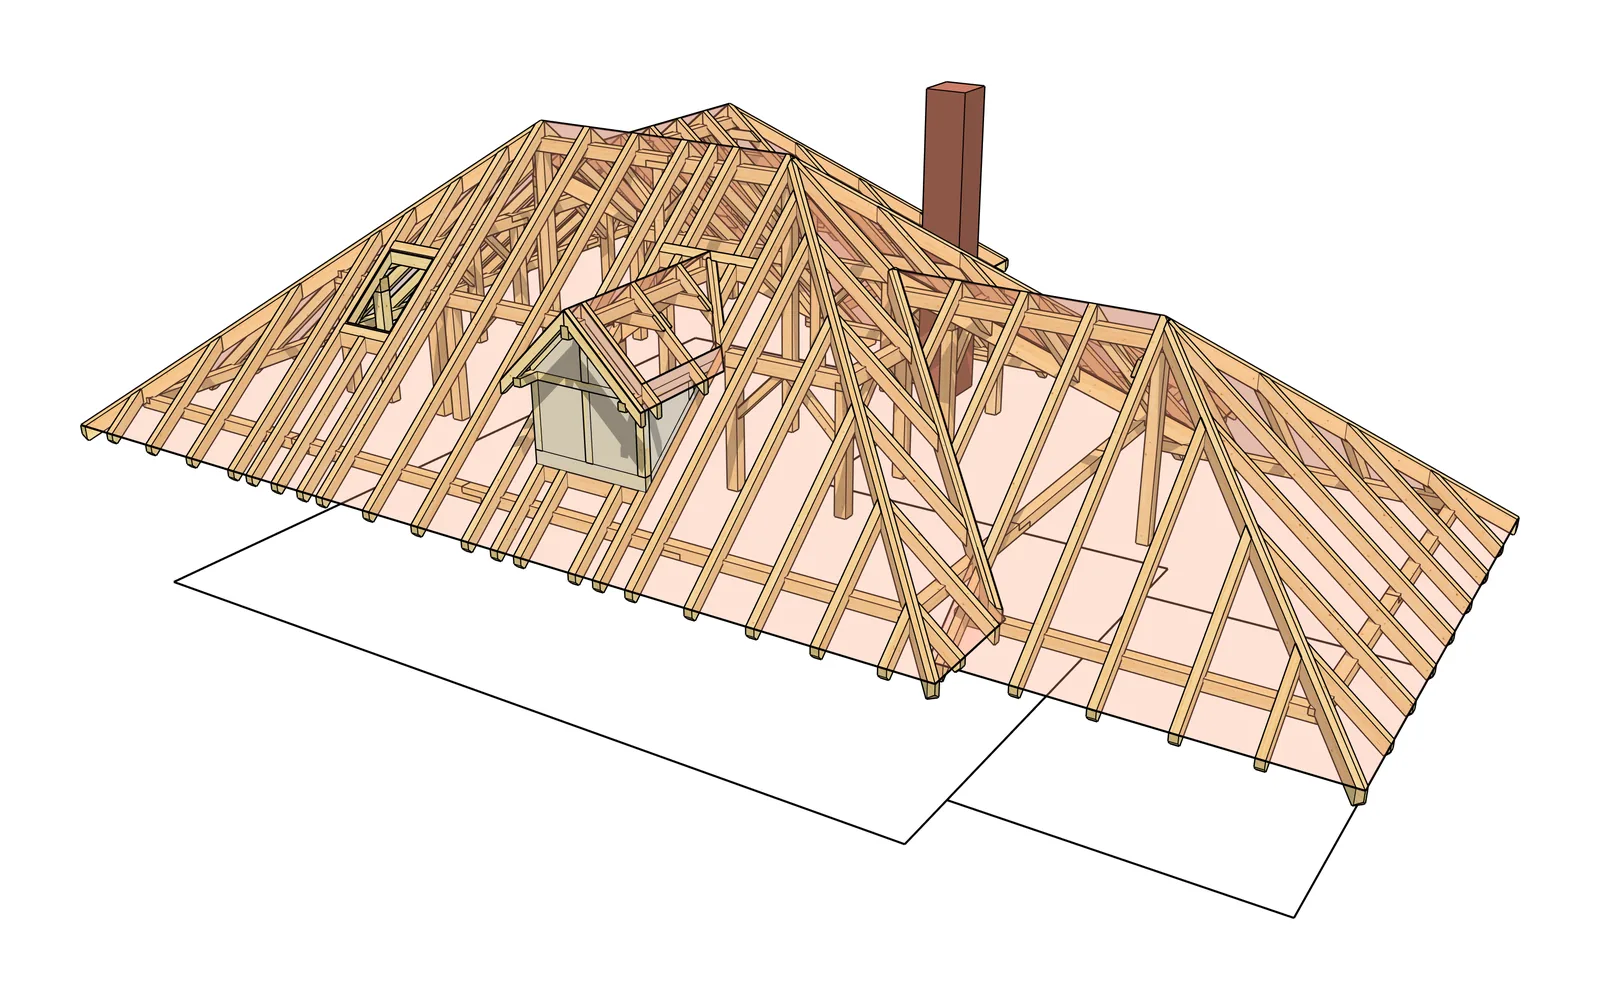
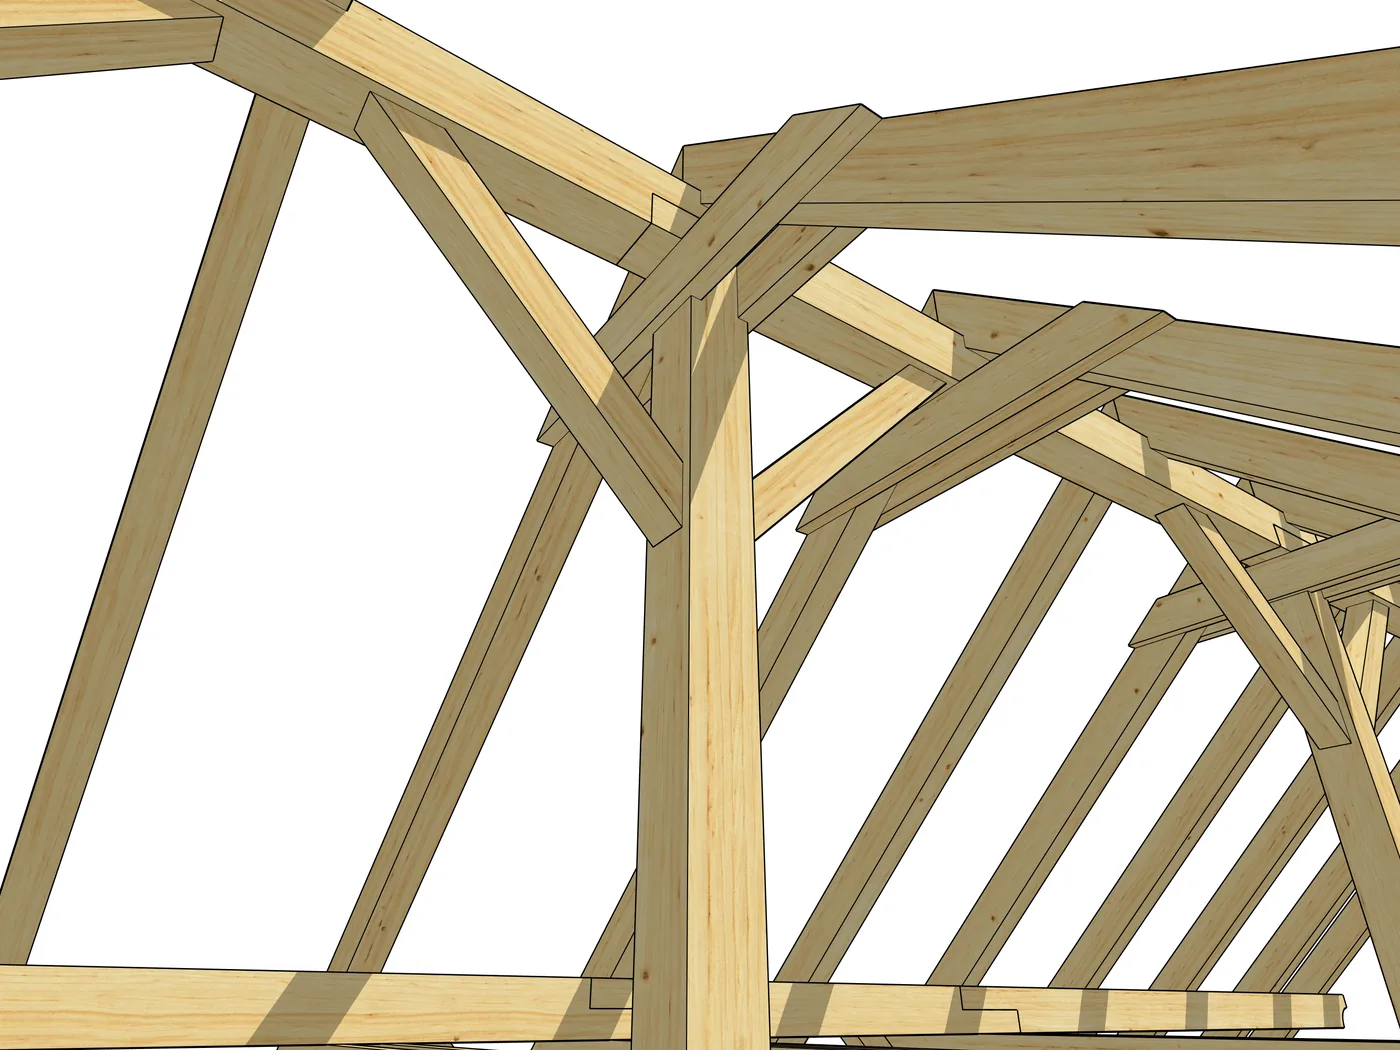
The plugin builds the frame under the roof planes the way a carpenter would: rafters sit on the purlins with a birdsmouth, long members are joined with lapped splices, and on a hip the jack rafters of both planes meet the hip rafter at one point.
- Rafters, hip rafters and valley rafters
- Wall plates, mid purlins and ridge purlins; the number of mid purlins follows from the span (1 above 3 m, 2 above 6 m, 3 above 9 m) and can be overridden
- Posts placed automatically, a collar on every rafter pair where it fits, and a second row of collars if you need it
- Knee braces between posts and purlins or rafters
- Standing or raking posts, with purlins half-lapped at the corners too
Dormers, roof windows, chimneys
With the Dormer tool you place a dormer or a recessed balcony on a roof plane: gable, shed, hipped, trapezoid or triangle dormers, or a loggia. The plugin builds it with its own rafters, valleys, ridge and cheek walls, and frames the main roof rafters around it with trimmer rafters and headers.
The Opening tool puts a roof window, a chimney or another opening on the roof surface; you can type the size, for example 78x118cm.

Rafter layout and member ends
There are two layout modes. With Aligned to junctions, rafters meet in pairs at the ridge, the hips and the valleys, and their spacing adjusts within the limits you set. Exact spacing keeps exactly the spacing you enter.
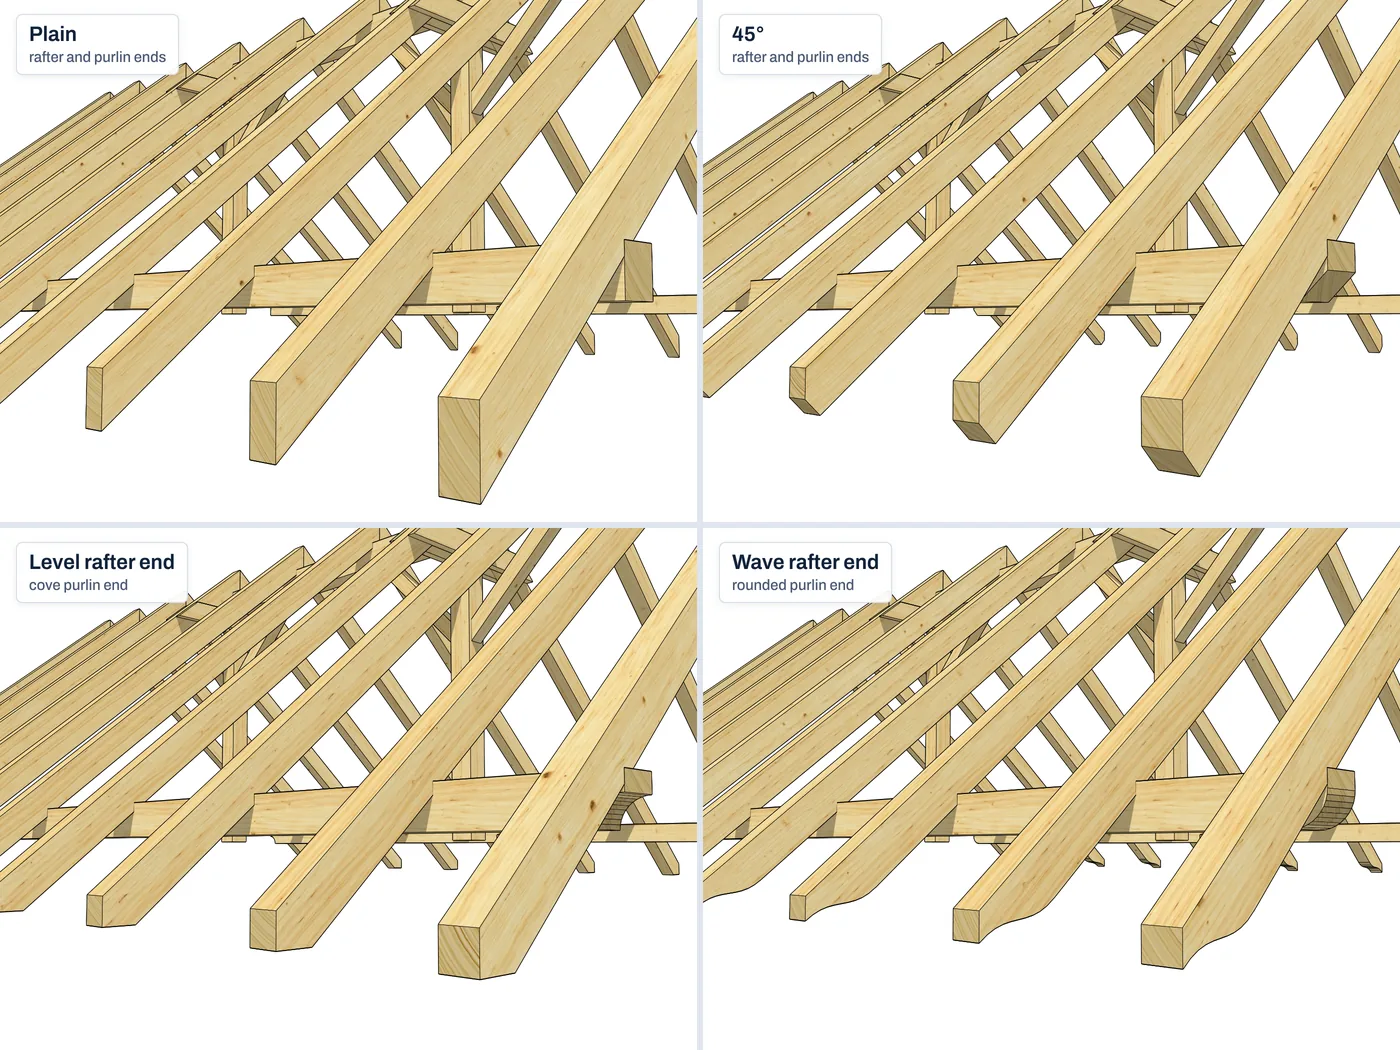
Rafter ends can be plain, half plumb with a 45° or level cut-back, or decorative. Purlin ends can be plain, cut at 45°, or one of two decorative profiles.
Manual additions that stay
With the Member editor you can insert a rafter, post, knee brace or mid purlin anywhere, or a free member defined by two points. When you add a mid purlin or a post, the plugin asks whether to add posts or knee braces too. When you copy with the mouse, it makes as many copies as you set in the Number of copies field.
Members you insert by hand stay in place when the roof is regenerated.

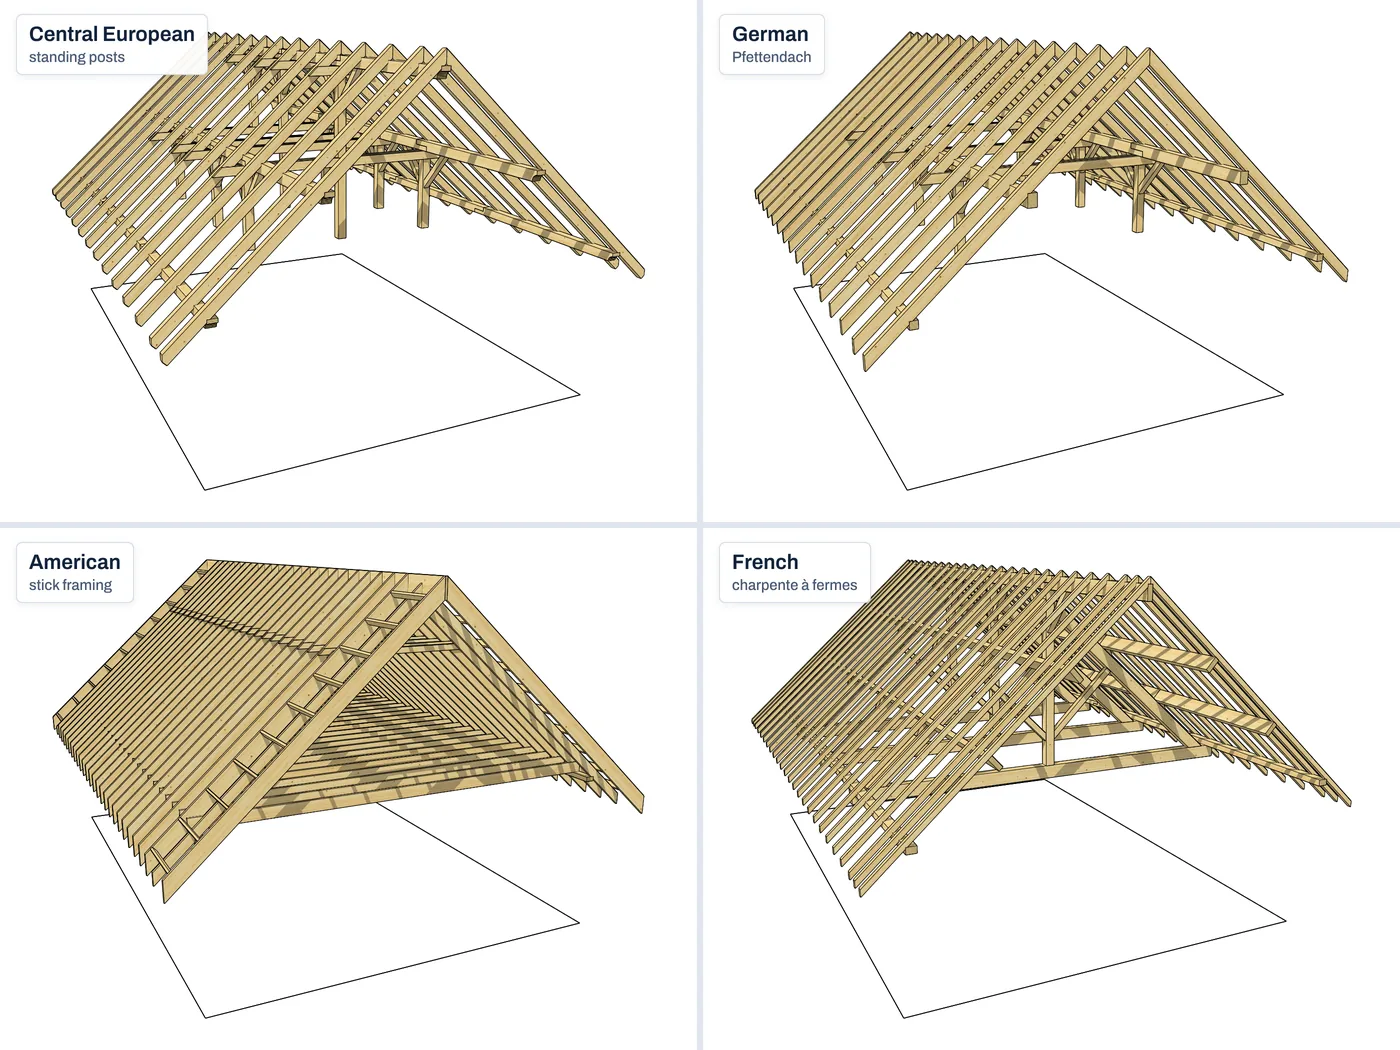
7 regional roof styles
A style is more than looks: one click sets the structural system, the cross sections, the spacing, the rafter and purlin ends, the collars and the tie beam. The built-in styles: Central European with standing or raking posts, German Pfettendach and Sparrendach, US stick framing, Scandinavian collar beam roof and French charpente à fermes. You can save your own settings as a style too.
- Central European standing posts with knee braces and principal frames
- French fermes with a double collar (moisé) and purlin cleats (chantignolles)
- US stick framing with ceiling joists and collar ties
- Scandinavian ridge board (mønebord) with a double collar beam
- Save and load your own cross-section profiles, with sample profiles for the DACH region, Scandinavia, the United Kingdom and Central Europe
Shop drawings and cut list
A dimensioned side view of every member on A4 sheets, several members per sheet. Your company name and logo go into the title block, so you can hand the drawings straight to the workshop or the client.
The cut list itemises every member of the structure with item numbers, lengths and cutting angles, and exports to Excel (XLSX) or CSV for quotes and material orders.

More details
- Quick wizard
- Guides you through on one panel: outline, edges, framing, done.
- Wood texture
- Members get grain along their length and end grain with growth rings; when it is off, members are coloured by type.
- Overview
- The roof data on one panel: area, roof edges, bill of materials, openings and warnings.
- Snow and wind load
- EC5-style span check from the snow load, and optional wind bracing (strap or board). For guidance only.
- Ridge board construction
- Square-topped ridge board and valley rafters, with dropped hip rafters; the bevelled version can be chosen in the settings.
- Remembered settings
- Cross sections are remembered from one session to the next.
- Units
- Follows the model units: works in metric and imperial models, and starts with imperial defaults in imperial models.
- Languages
- English, German, French, Italian, Spanish, Japanese, Russian, Hungarian, Polish and Swedish interface.
- Built-in help
- The Tips and tricks panel and ⓘ help on every panel, right inside the plugin.
- System requirements
- SketchUp 2024 or later.
Important: RoofGenius Pro is a design aid. The snow and wind load check and the suggested cross sections are for guidance only and are not a structural calculation. Every drawing must be checked by a qualified professional and a structural engineer before fabrication or construction.
Try it free for 14 days
Download, install, and use every feature for two weeks. No credit card required.
RoofGeniusPro.rbz · SketchUp 2024 or later
Freefor 14 calendar days
- Every feature, no restrictions
- No credit card required
- Reminders 3 days before expiry, on the last day and at expiry
- After expiry, your models and the cut list stay viewable
Installation
- Download the
RoofGeniusPro.rbzfile. - In SketchUp, open Extensions › Extension Manager.
- Click Install Extension and select the downloaded file.
- On first launch, read and accept the terms of use. The RoofGenius Pro toolbar then appears; its first button is the Quick wizard.
Frequently asked questions
How long does it take to learn?
Not long. The Quick wizard walks you step by step from the floor plan outline to the finished roof structure, so you don't need to read a manual for your first roof. The Tips and tricks panel inside the plugin shows keyboard shortcuts and proven techniques, and the interface is available in ten languages.
How much work does it save?
RoofGenius Pro does the most time-consuming, repetitive part of the roof for you: editing the roof planes, laying out the rafters, placing purlins, posts, collars and knee braces, working out the cutting angles and compiling the cut list. If you change the roof, one click recalculates everything; you don't have to start again.
How complex a roof can it handle?
Walls at any angle, L-, T- and U-shaped plans, courtyards, taller towers, extensions with a different eave height and several buildings in one drawing. Hips, half-hips, mansards, dormers, roof windows and chimneys are covered too, and for unusual shapes there is the freehand roof.
Will it make quoting faster?
Yes. The cut list itemises every member of the structure with item numbers, lengths and cutting angles, and saves to Excel or CSV in one click. Material orders and quotes can be prepared straight from it, and the list updates when you change the roof.
Can I hand the drawings straight to the workshop?
Yes. The A4 shop drawings show every member in a dimensioned side view, with your company name and logo in the title block, so the sheets can go straight to the workshop or the client.
Can I adapt it to my own carpentry tradition?
Yes. Choose from seven built-in regional styles, and save your own settings as a style or a cross-section profile, so every new roof starts with the structure you are used to.
Are my manual changes kept?
Yes. The plugin only creates and updates its own members and leaves the rest of your drawing alone. Rafters, posts and knee braces inserted with the Member editor stay in place when the roof is regenerated.
Can I edit the roof plane with SketchUp's tools?
Yes. Parametrically in the Edge editor, or freely with SketchUp's tools. After free editing, the roof surface is detached from the floor plan, and from then on the drawn plane is what counts.
Does it work in imperial models?
Yes. The plugin follows the model units, starts with imperial defaults in imperial models, and the US stick framing style builds an American-style structure.
Which languages does it support?
English, German, French, Italian, Spanish, Japanese, Russian, Hungarian, Polish and Swedish.
Do I need a credit card for the trial?
No. Download it, install it, and use every feature for 14 days.
What happens when the trial ends?
The plugin switches to view mode: you can look at the existing structure and the cut list, but you cannot generate new members, export or make shop drawings. Once you enter a licence key, every feature is available again immediately, and your model stays unchanged.
How do I get the licence?
After purchase you receive the licence key by email and activate it in the plugin.
Does RoofGenius Pro do structural calculations?
No. The snow and wind load check and the suggested cross sections are for guidance only. Every design must be checked by a qualified professional and a structural engineer before fabrication or construction.


Designing solar too?
SolarGenius Pro lays out the panels on the same roof and shows you the system size.