
Solar panel layouts in minutes
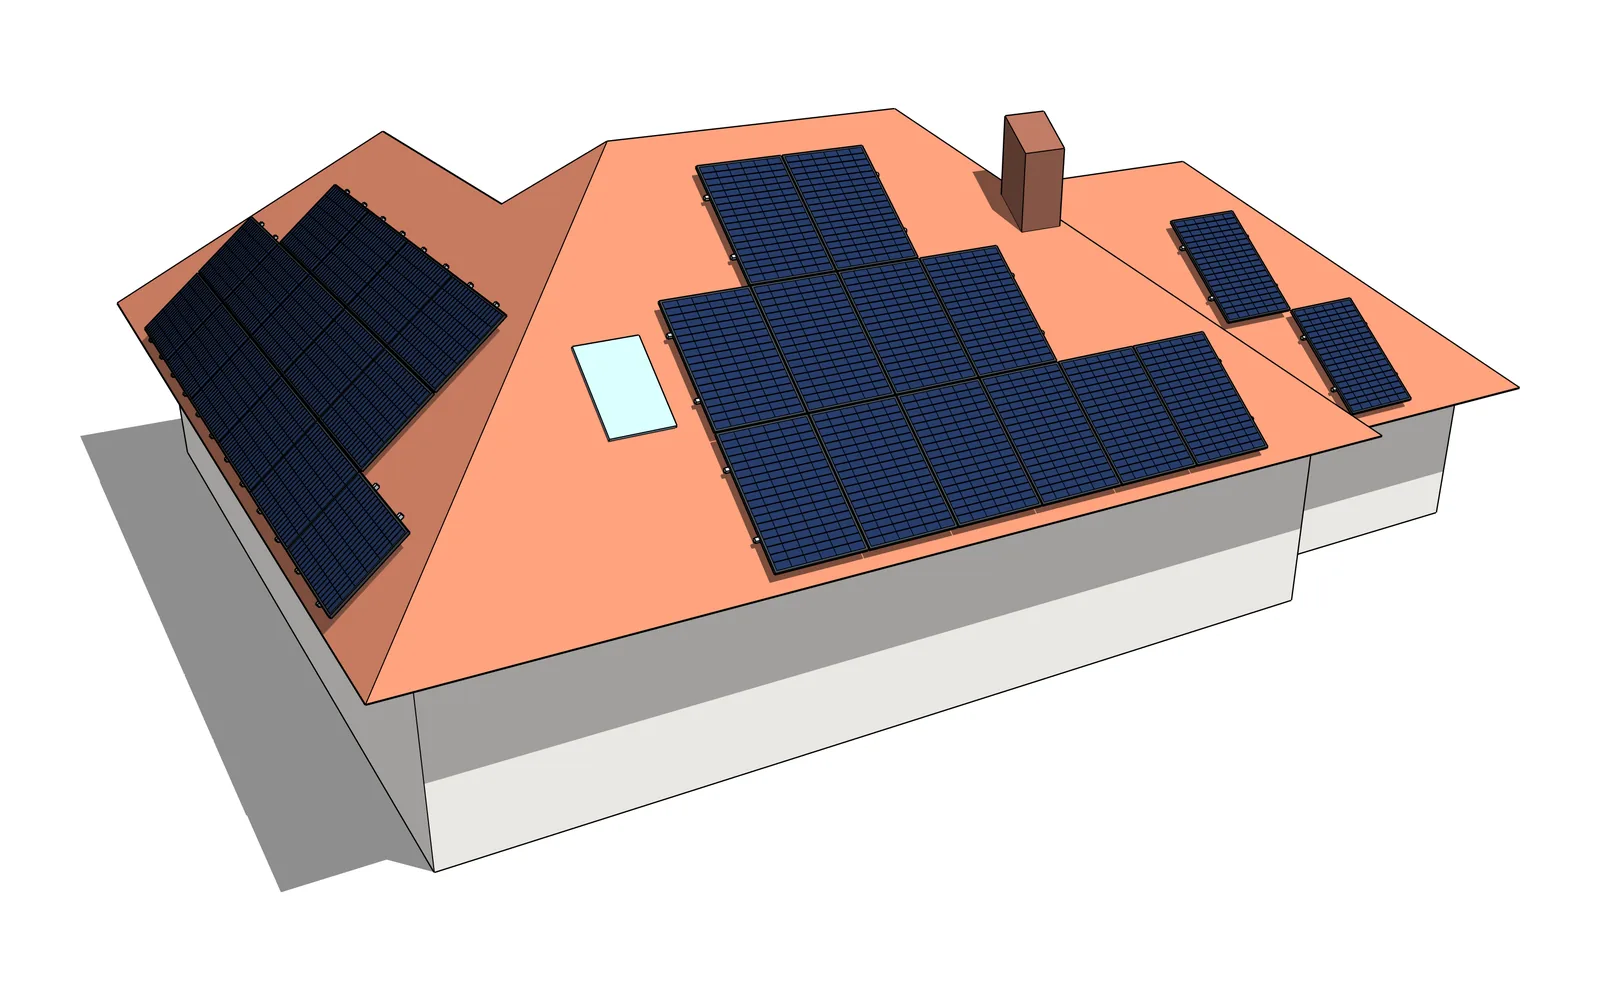
SolarGenius Pro lays out solar panels on the roof faces, respecting setbacks and obstacles, and shows you the panel count and system size straight away. The roof is drawn from a 2D outline by the RoofGenius Pro engine, or you can draw it freely.
- SketchUp 2024 or later
- Metric and imperial
- Panel count and kWp per roof face
- 14-day trial, no credit card
See it in action
A one-minute overview: from any roof to a finished solar layout, with mounting, shading analysis and a 3D model you can show your client.
Four steps from roof to overview
-
 1
Roof surface
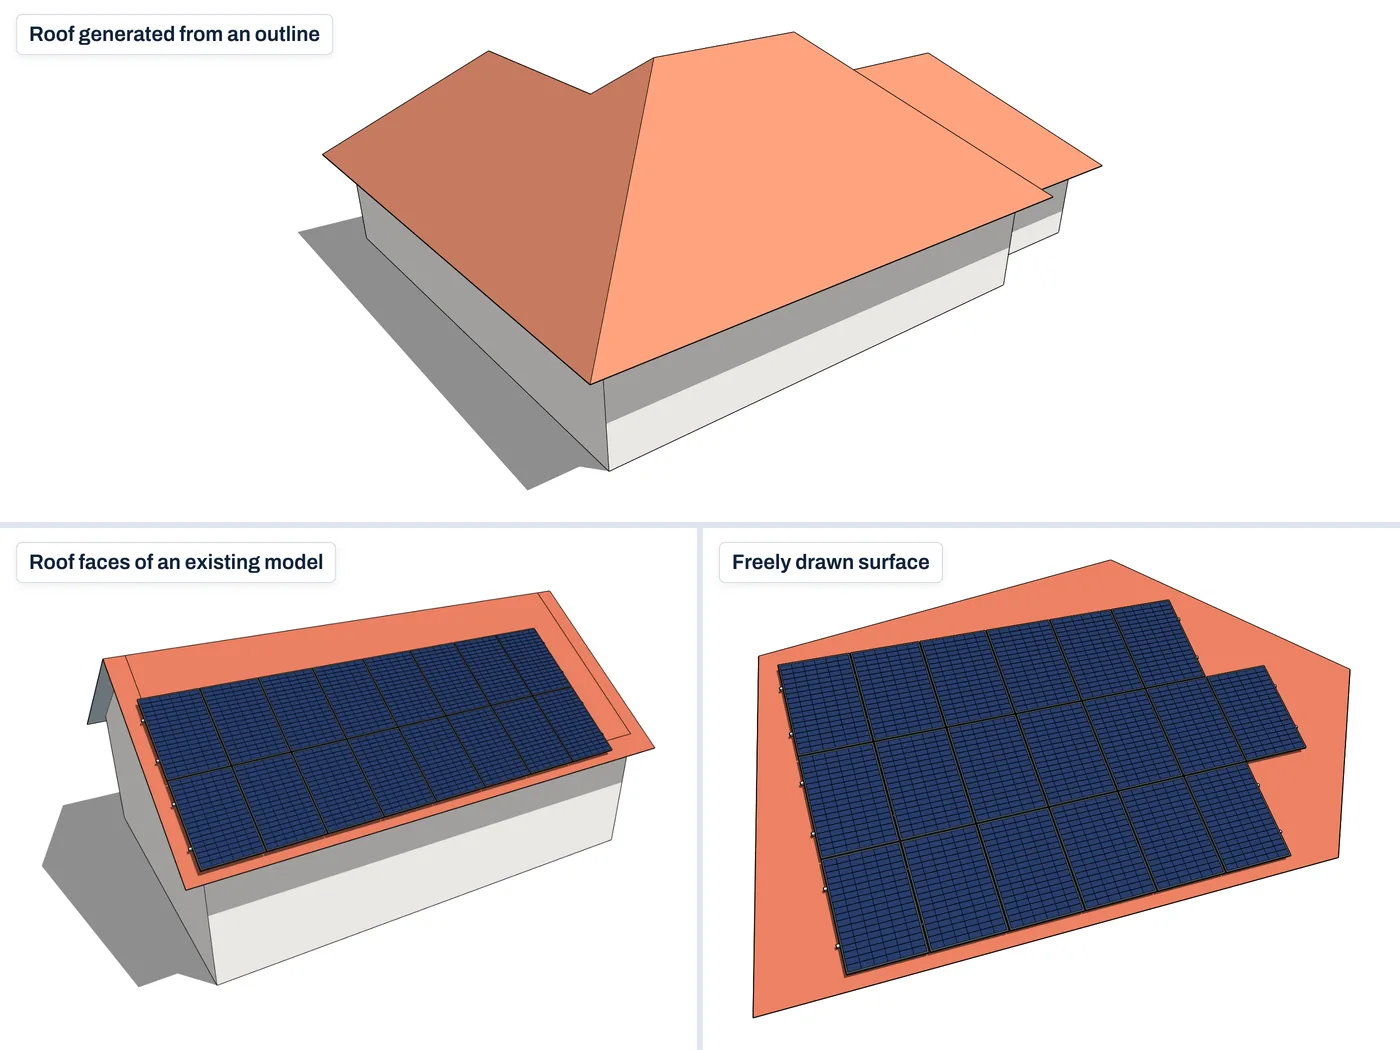
Draw the outline of the house, and the built-in RoofGenius engine creates the roof planes. If the roof is already in the model, select its faces, or draw a roof surface freely.
-
 2
Choose the module
Pick a module from the library or enter your own: width, length, thickness and rated power (Wp).
-
 3
Layout
Set the orientation, the gaps and the setbacks. The plugin fits as many panels as possible and leaves the keep-out zones free.
-
 4
Overview
See the panel count, system size, estimated annual yield and coverage per roof face and in total, then export to CSV or print an A4 layout plan.
What SolarGenius Pro can do
The roof surface, three ways
Many solar quotes start with a house that has no SketchUp model yet. SolarGenius Pro includes the RoofGenius Pro roof engine: draw the wall outline, set the pitch, and the roof is ready.
- Roof generated from an outline, with a pitch for each edge
- Select existing roof faces in the model
- Freely drawn roof surface for unusual shapes, flat roofs too
Portrait or landscape, with exact gaps
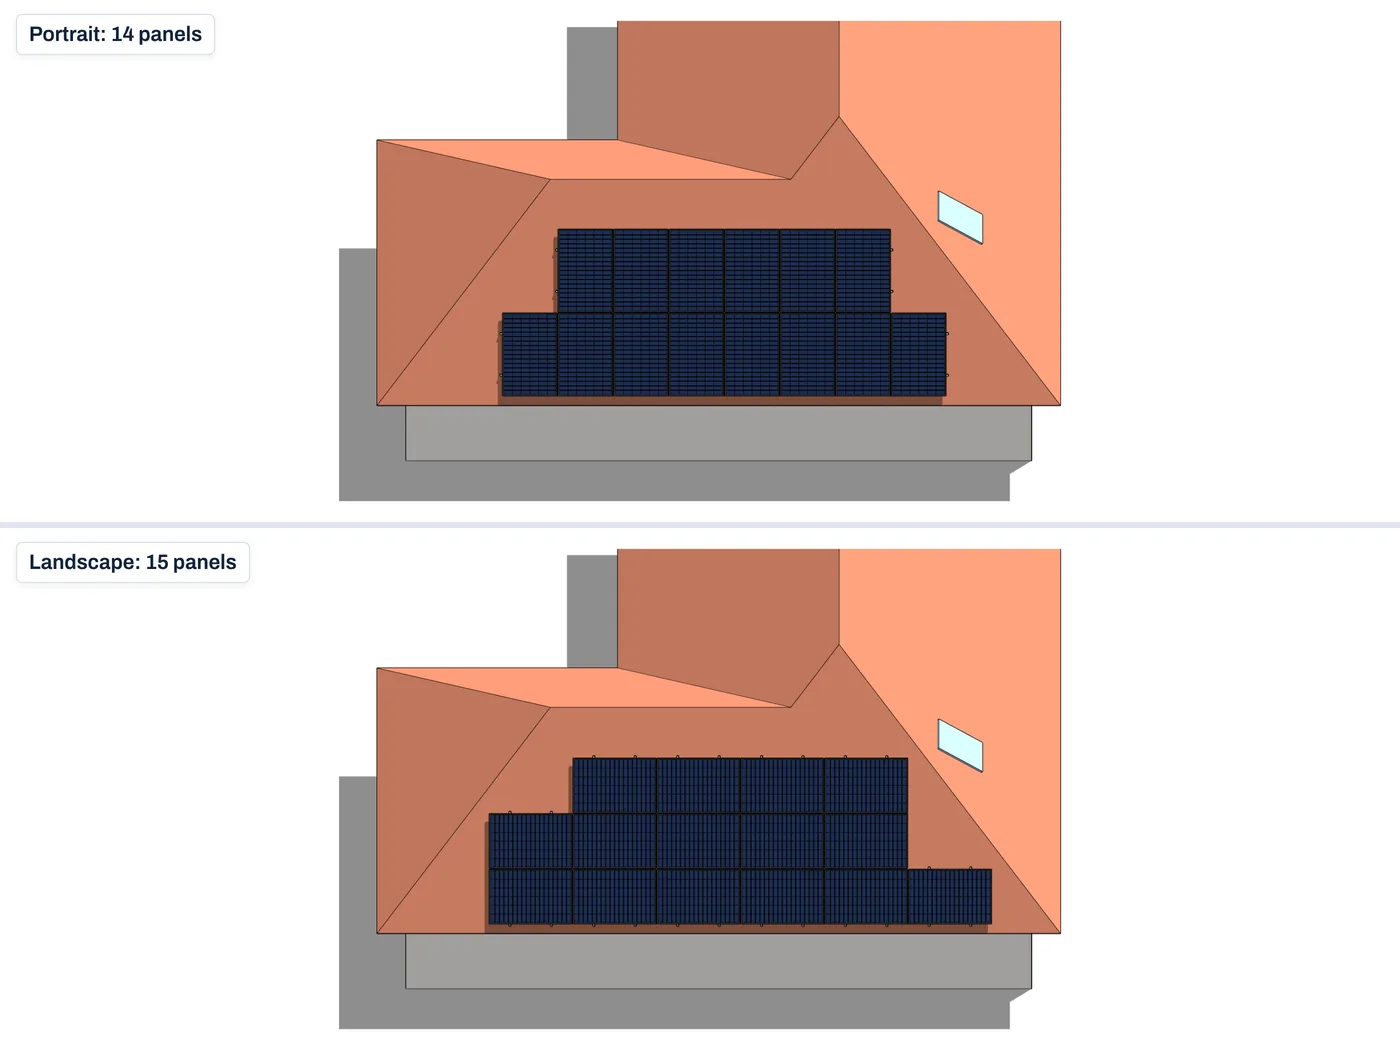
Choose per roof face whether the panels go in portrait or landscape. The horizontal and vertical gaps between panels are set separately, so the space the clamps need shows up accurately in the drawing.
- A different orientation for each roof face
- Separate horizontal and vertical gaps
- Save your own modules to the library, swap modules in one click
Setbacks and keep-out zones
Separate setbacks can be set from the eave, the ridge, the rake, the hips and the valleys, so the strips required by local regulations and wind zones stay clear. Pick a rule set – Germany, Austria, the USA or general EU practice – and every value is set at once, or enter your own.
Chimneys, roof windows and vents get a safety margin around them. No panel overlaps an obstacle or hangs over the edge of the roof.

Fine-tuning by hand
After the automatic layout you can remove or add panels one by one, for example where an aerial or a planned roof window will go. The overview updates after every change.

Annual shading analysis
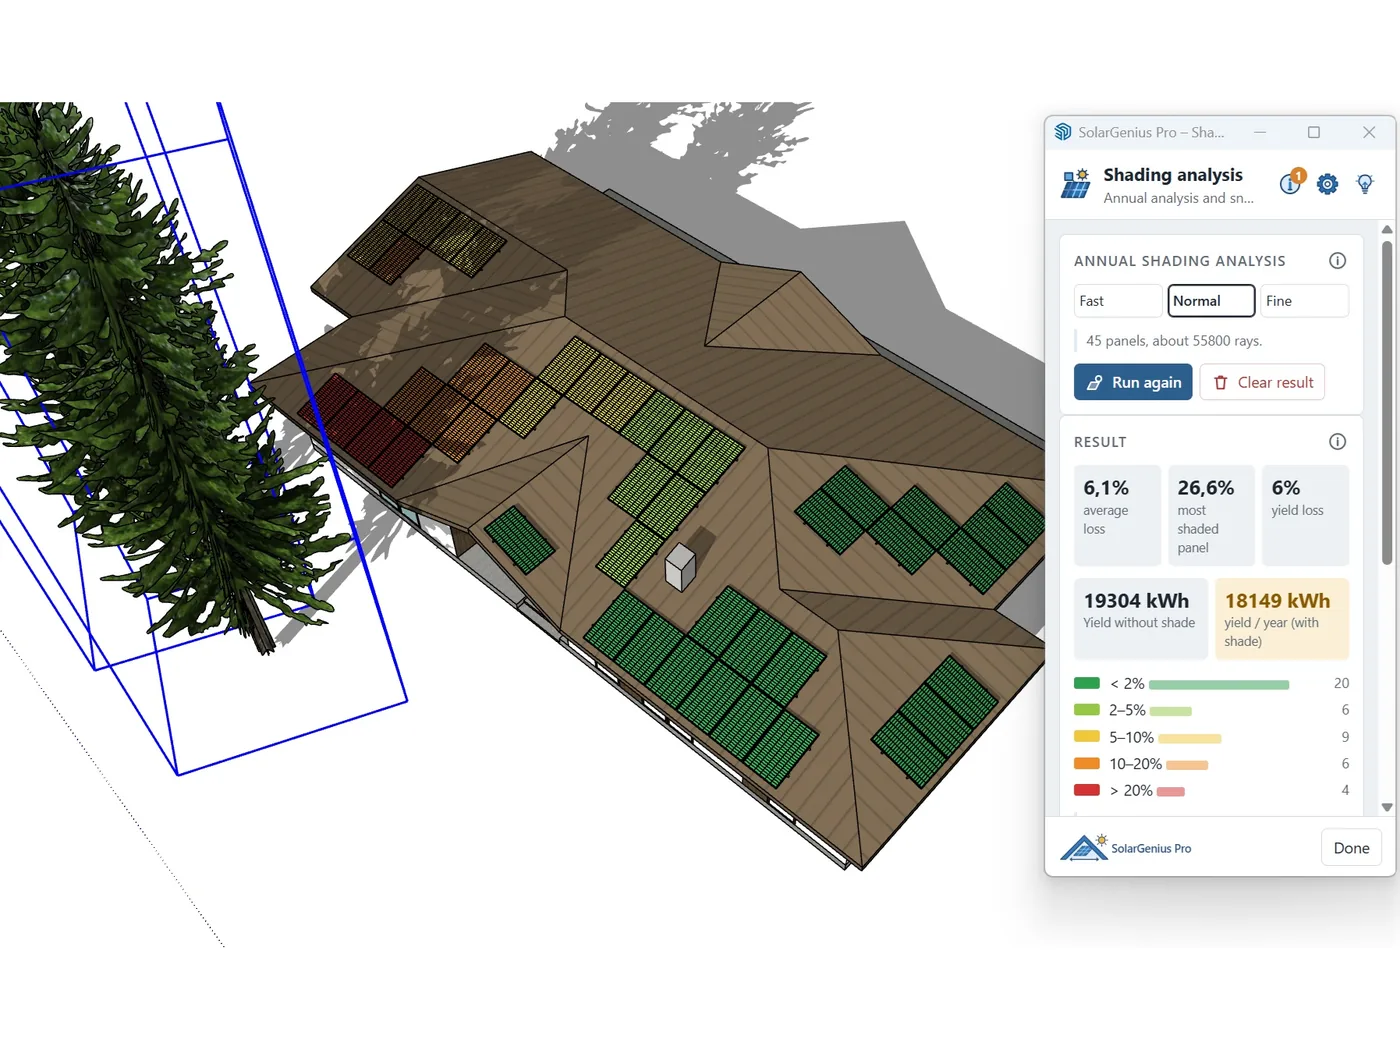
The plugin works through the sun positions of the whole year for the site's latitude and north direction, and checks from every panel's surface whether it can see the sun. If a ray towards the sun hits a building, a tree, a chimney, another part of the roof or another panel in the model, that point is in shade. The result shows, for each panel, what percentage of the annual irradiation is lost to shading.
Panels are coloured by their loss, so you can see at a glance which positions are a problem. Panels shaded beyond a limit you set can be switched off with one button – without optimisers, one shaded panel holds back the rest of its string – and switched back on at any time in the Panel editor.
- Average and worst panel loss, annual yield with and without shading
- Fast, Normal or Fine calculation
- Snapshot at the date and time of the SketchUp shadow settings
- The result also goes into the layout plan
Shading of diffuse light is not counted, so the reported loss is, if anything, an underestimate.
More details
- Overview
- Panel count, system size (kWp), coverage, estimated annual yield, orientation and tilt per roof face and in total, with a mounting estimate.
- Flat roofs
- Tilted rows or east–west pairs, with the row spacing worked out from the latitude.
- Mounting
- Rails, roof hooks and tilt frames drawn in 3D on their own tag, with clamps counted in the bill of materials. An estimate: the final design comes from the mounting manufacturer.
- Strings
- Choose an inverter, and the plugin assigns strings and MPPTs and checks voltage, current and the DC/AC ratio.
- Report and quote
- A printable A4 layout plan with your company details and logo, and a quote with unit prices, custom items, discount and VAT, both saved as PDF. The data also exports to CSV.
- RoofGenius Pro roofs
- Lay out panels directly on roofs made in RoofGenius Pro.
- Organised model
- Panels sit on their own tag and can be hidden or shown with one click.
- Units
- Follows the model units: millimetres, centimetres, metres or inches.
- Languages
- English, German, French, Italian, Spanish, Japanese, Russian, Hungarian, Polish and Swedish interface.
- System requirements
- SketchUp 2024 or later.
Important: SolarGenius Pro is a design aid. The layout does not replace a site survey, a structural check of the roof's load-bearing capacity or the electrical design.
Try it free for 14 days
Download, install, and use every feature for two weeks. No credit card required.
SolarGeniusPro.rbz · SketchUp 2024 or later
Freefor 14 calendar days
- Every feature, no restrictions
- No credit card required
- A reminder before the trial ends
- After expiry, your models stay viewable
Installation
- Download the
SolarGeniusPro.rbzfile. - In SketchUp, open Extensions › Extension Manager.
- Click Install Extension and select the downloaded file.
- On first launch, read and accept the terms of use. The SolarGenius Pro toolbar then appears.
Frequently asked questions
How much faster will my quotes be?
Considerably. The plugin lays out the panels, measures the setback strips and keep-out zones, and adds up the panel count and system size for you. Laying out a family house roof no longer takes hours, and you see the panel count and kWp for each roof face straight away.
Can I use it if I don't have a model of the house yet?
Yes. SolarGenius Pro includes the RoofGenius Pro roof engine: draw the wall outline, set the pitch, and the roof is ready for the panels.
Can I show the client what it will look like?
Yes. The panels are real 3D objects in the model, so you can present the roof as a visualisation. With the shading analysis you can also show how much yield the shadow of a chimney, a tree or the neighbouring building takes away.
Does it work on unusual roof shapes?
Yes. You can select the roof faces of an existing model, and for a special shape you can draw the roof surface freely. Flat roofs work too.
Can I work with my own modules?
Yes. Any module can be added with its dimensions and rated power, saved to the library and swapped into the layout with one click.
Do I need RoofGenius Pro as well?
No. SolarGenius Pro works on its own, with the roof engine built in. If you already have a roof made in RoofGenius Pro, you can lay out the panels on it directly.
Does it work in imperial models?
Yes, the plugin follows the model units.
Which languages does it support?
English, German, French, Italian, Spanish, Japanese, Russian, Hungarian, Polish and Swedish.
What happens when the trial ends?
The plugin switches to view mode: you can look at your existing layouts, but you cannot create new ones. Once you enter a licence key, every feature is available again immediately.
Does it calculate the annual yield?
It gives an estimate. The specific yield you set for your region on an optimally oriented plane is adjusted for each roof face's tilt and azimuth, and the shading analysis can reduce it further. For the final figure, check with a dedicated service such as the European Commission's free PVGIS calculator, or with measured data.
Does it take fire safety and wind zone rules into account?
The setbacks come from a rule set or from your own values. The rule sets cover the part of the regulations that software can check: fire walls and smoke vents have to be placed as obstacles, and full compliance and agreement with the authorities remain the designer's responsibility.
Does it design the mounting and the strings?
It gives you a solid starting point. It estimates the rail mounting – rails, roof hooks, clamps – for the bill of materials, and it assigns strings to the inverter you choose and checks the voltage and current limits. The final mounting design, with wind and snow loads, comes from the mounting manufacturer, and the electrical design is the installer's job.


Designing the roof structure too?
RoofGenius Pro builds a complete timber roof structure from the same outline, with shop drawings and a cut list.